


Xcode String Catalogs: Compile-Time Safety, Code Completion, and RTL Gotchas


When developing an app for Apple devices using Xcode, some things are easier to build throughout the whole process, rather than tackling one giant task at the end. Localization is one of those features where it’s best and easiest to implement if you are thinking and building for it with each new feature.
Localization Explained
Quite simply, localizing your app allows it to support multiple different languages, catering to those who want to use your app but may not speak your native language. My native language is English, and for the rest of this article, will be used as the starting point for conversations.
Another additional benefit, depending on your implementation, is compile-time safety that ensures your string translations exist (more on this later).
Steps to Localize Your App
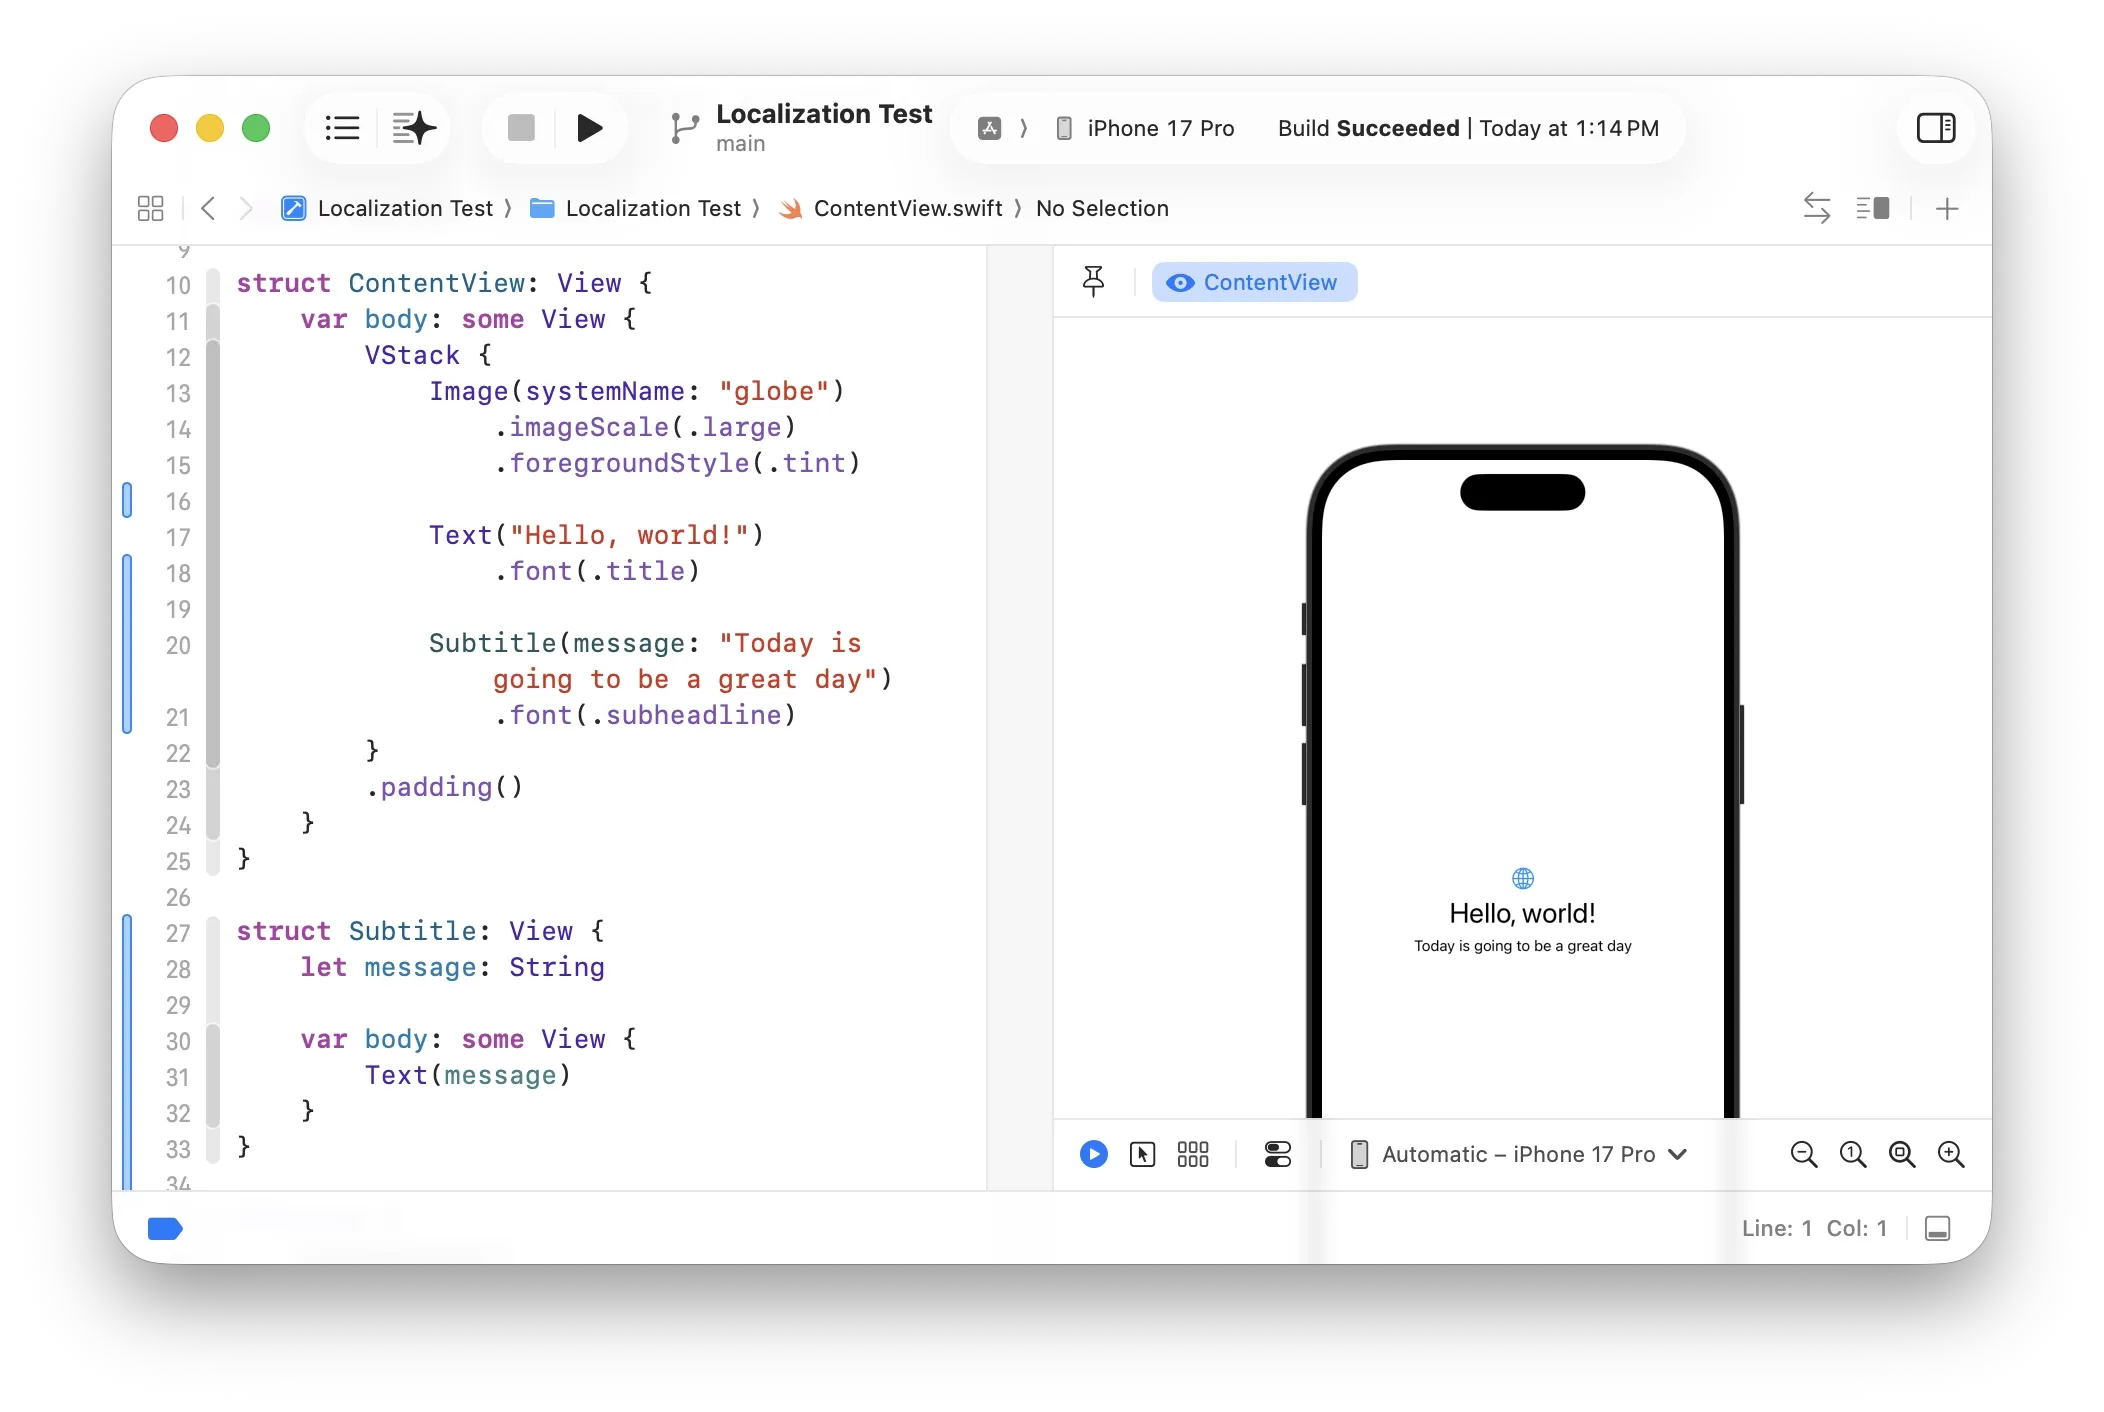
I’ve created a small “Hello World” project for this demonstration. Right now the entire thing is in English, without any capability of adding new languages.
First, you’ll need to add a new String Catalog (.xcstrings file) to the project. Xcode has a file template that you should use when adding the catalog, and I like to add this file to my Resources folder inside my project.
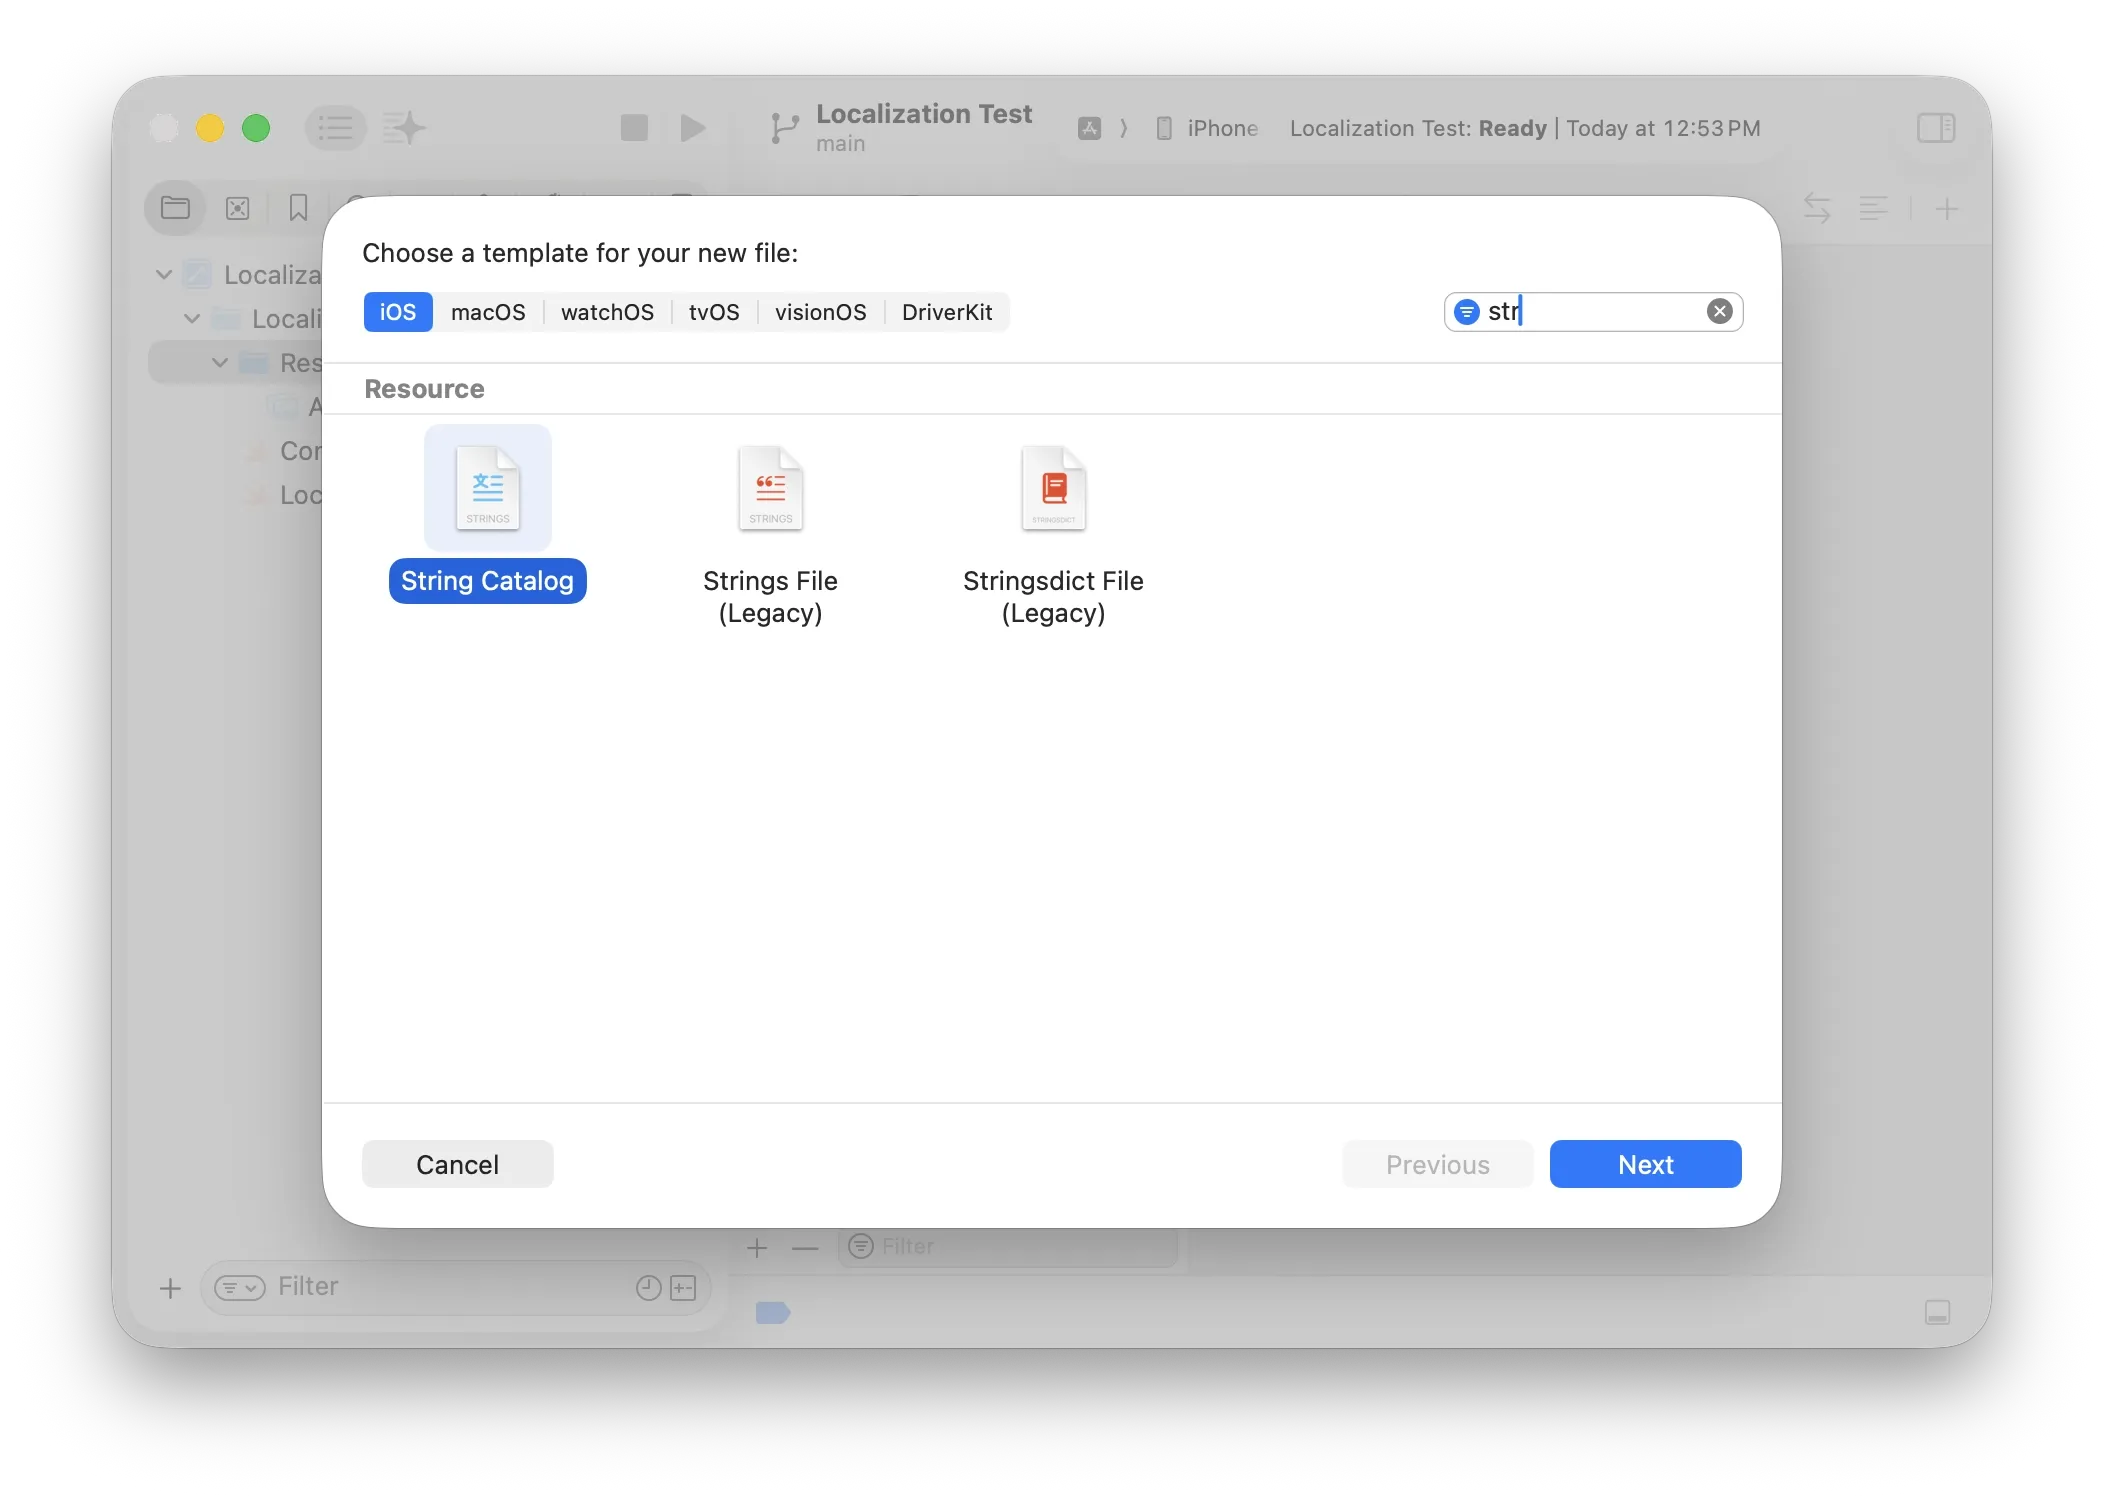
Name it whatever you want (Localizable.xcstrings is the default), but if you think you want to scope your strings to different parts of your app, consider naming your file the same name as a feature/tab/etc. I’m going to stick with the default in this example.
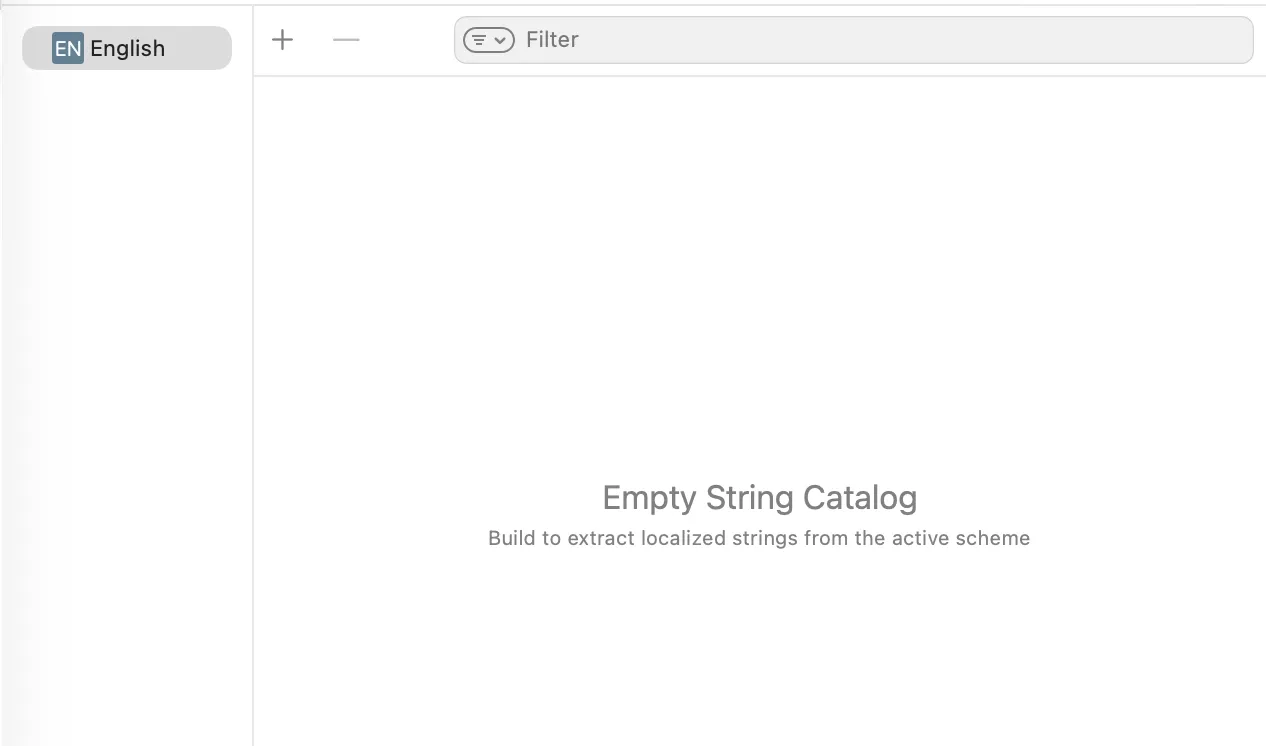
This will create an empty String Catalog, which we will soon populate with the strings used in your app. At this point you have two choices:
- Build the app.
-
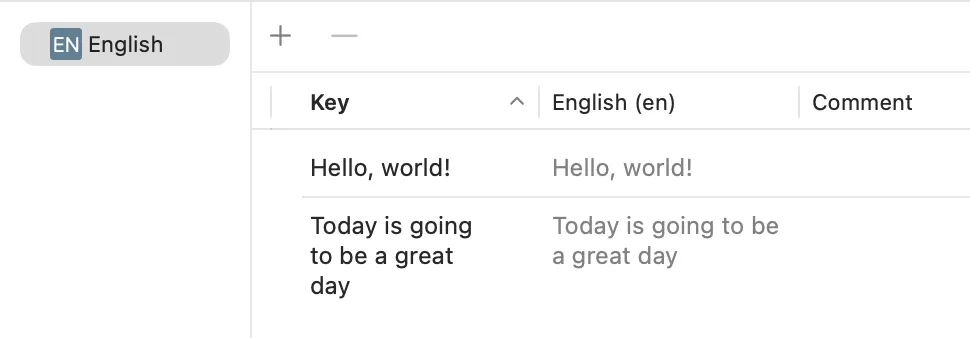
Doing this will pick out every pre-existing string in your app and add it to your strings catalog. Each new entry will have a key that matches the string value exactly (at least in English).

-
You might notice that we’re missing a string: “Today is going to be a great day” This is because our
Subtitleview accepts aStringand we are simply passing in a rawStringto the view’s initializer:message: "Today is going to be a great day". If we change this line tomessage: String(localized: "Today is going to be a great day") Now when you rebuild your project, you’ll see the new string in your catalog.
-
- A moment ago I mentioned that there were two options when adding new strings, so let’s take a look at the second option: Adding strings directly to your catalog.
Keeping the positive feeling of our app, let’s add a new string, “…and tomorrow will be great as well!”
- Tap the + to create a new entry in the catalog.
- Name the key something descriptive… I went with
main.tomorrow.subtitle, which is a naming scheme to help scope strings to specific locations in the app. You could just as easily name itduckif you’d like, but it might be confusing down the road. - Add your string to the English (en) translation.
- Comment is optional, and can help provide context in the future for why you might want to use this string.
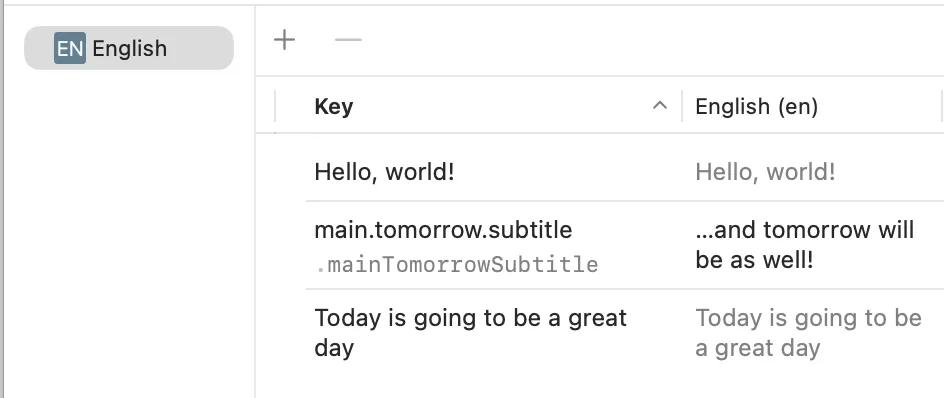
At this point you’ll probably notice your new string key has turned camel case (.mainTomorrowSubtitle). Let’s add a new Text to our view and see how it works…
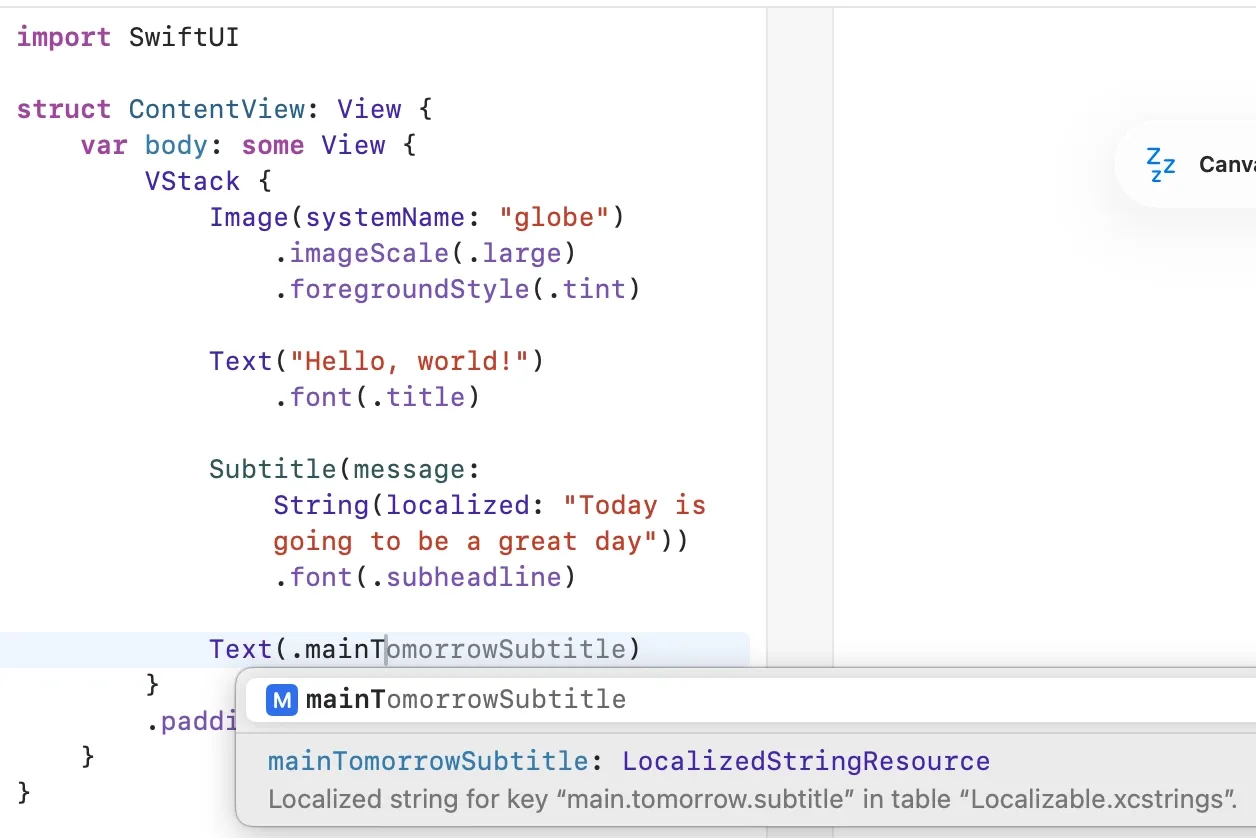 We now get code completion help, AND compiler support for our localized strings, which is super nice.
And just for posterity, we can do the same thing with a String(localized: ):
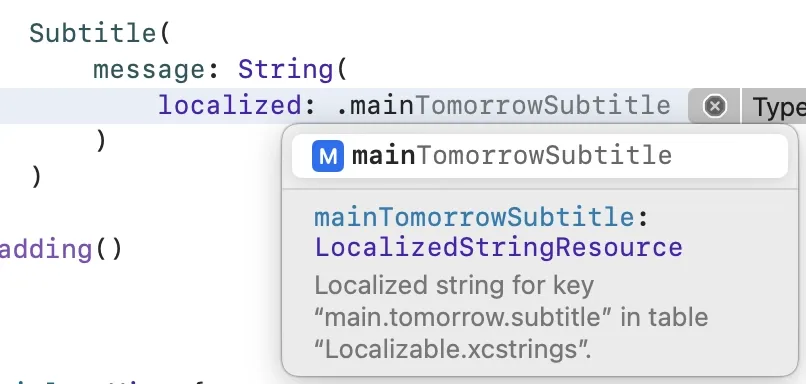
Two additional benefits of using the key-based strategy are compile-time checks and code completion. If you try to build your app using a string key that doesn’t exist, you’ll get an error. Likewise when you’re coding and need a string, you’ll get autocompletion after typing a period. If you add a “Comment” to your string, that information will be available in the completion menu.
When One Locale Just Isn’t Enough
Now that we know why and how to localize our apps, let’s add support for another language.
- Open your String Catalog file
- Tap the + button and choose a new language (I’m going with Spanish here)
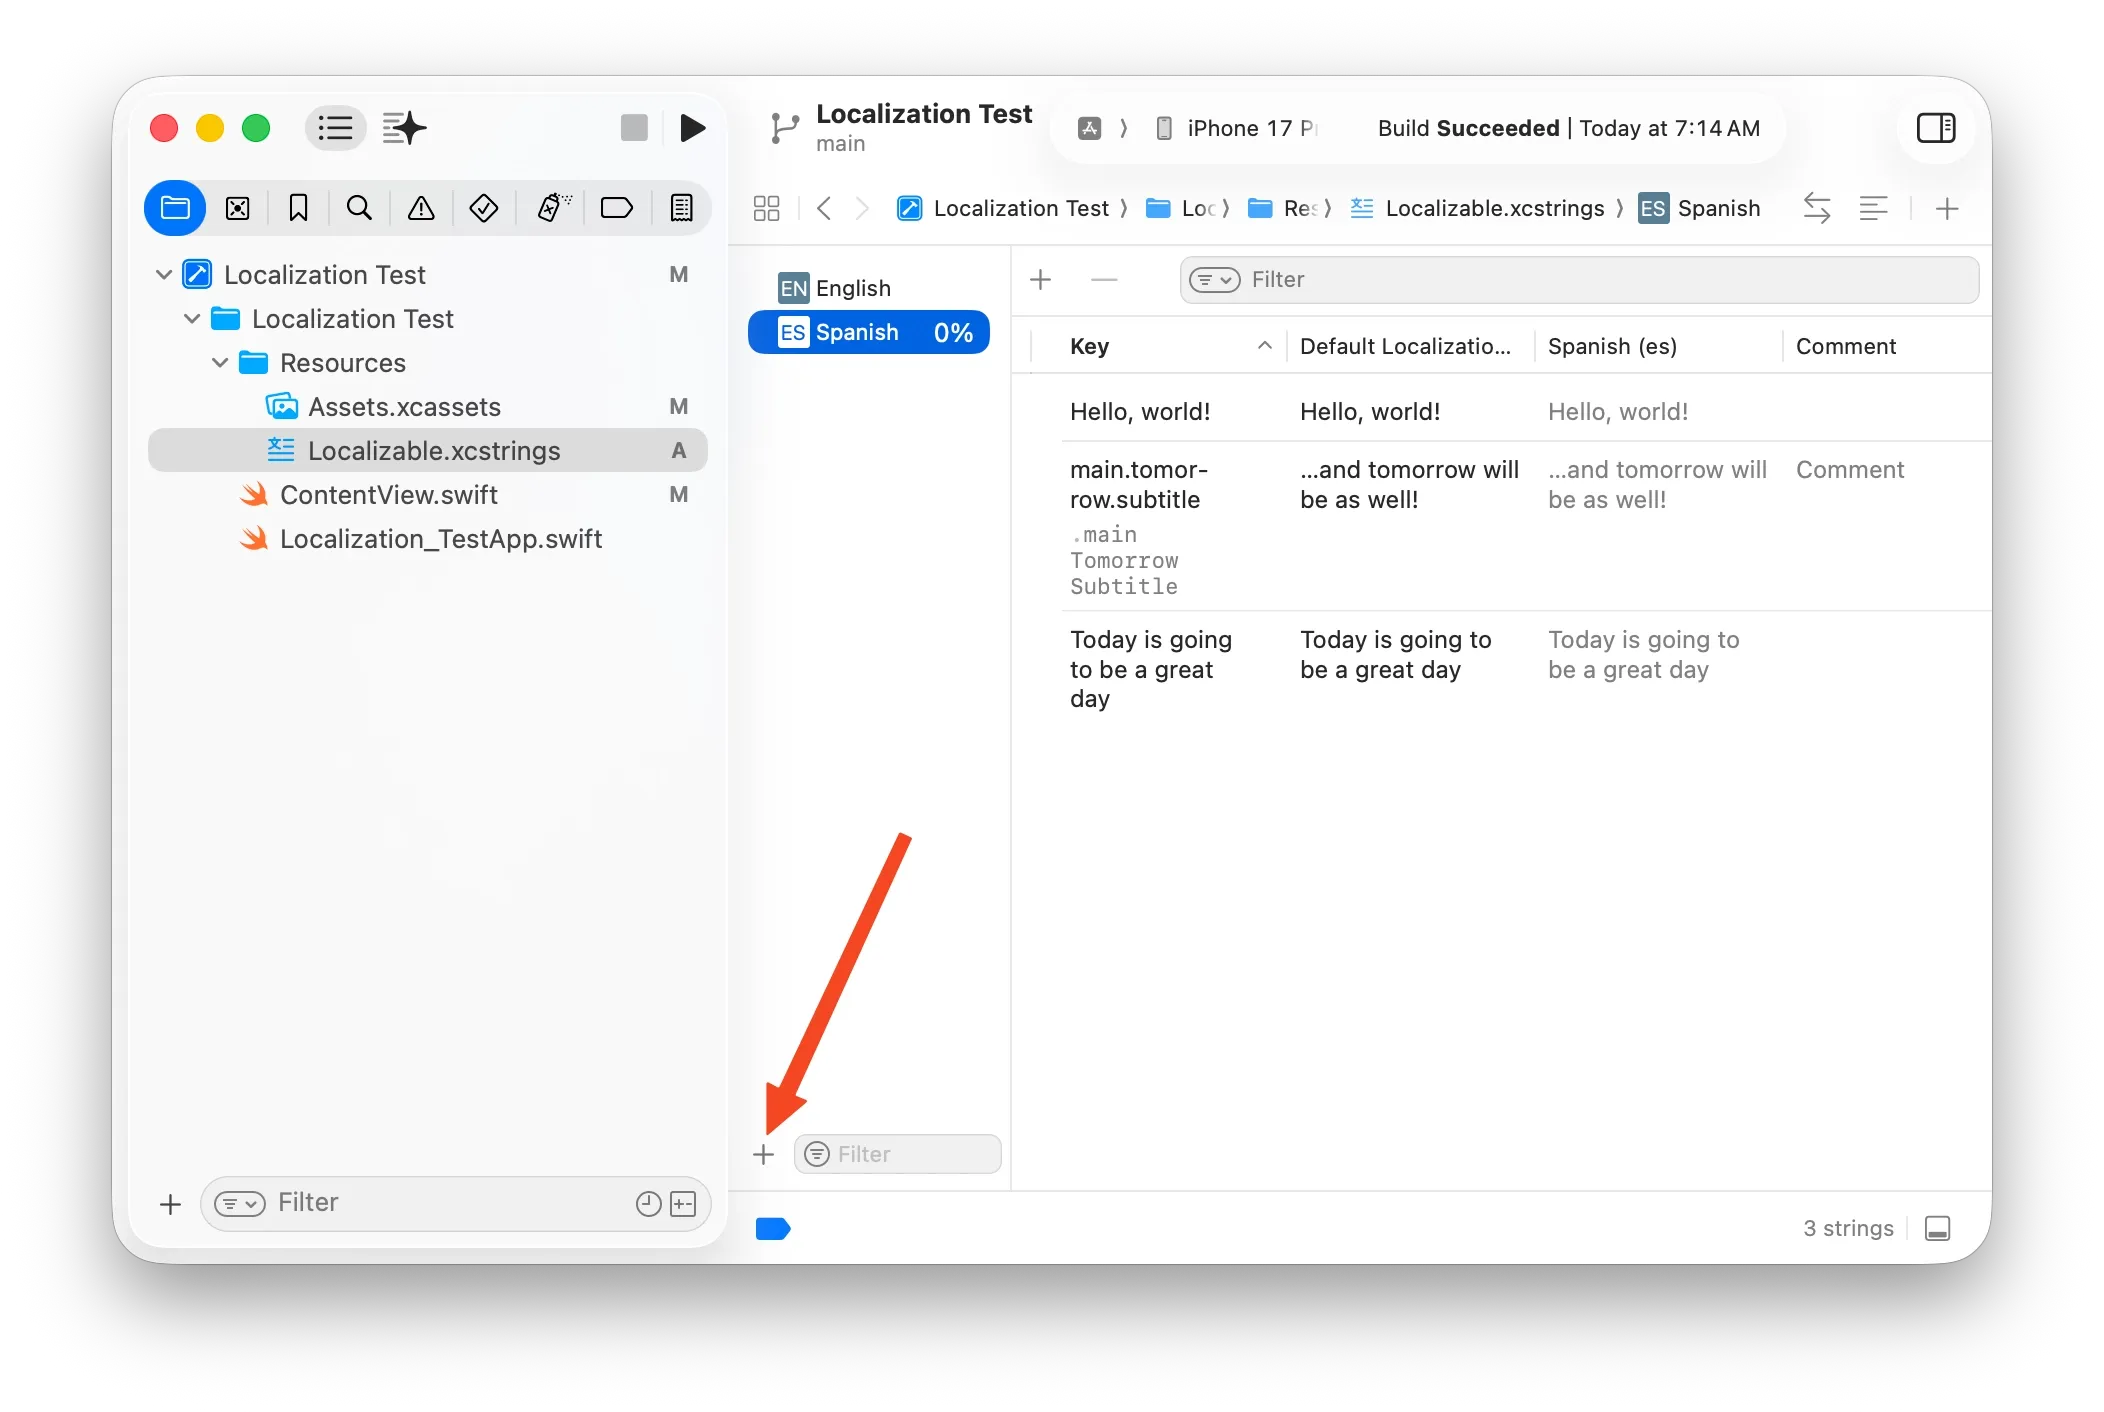
Now we have a new catalog where we can update our strings for Spanish. There’s even a nifty completion percentage indicator to show you just how many of your strings have been updated to the new language.
Using Google Translate, I’m going to update these strings in Spanish.
Making Sure Every Locale Behaves
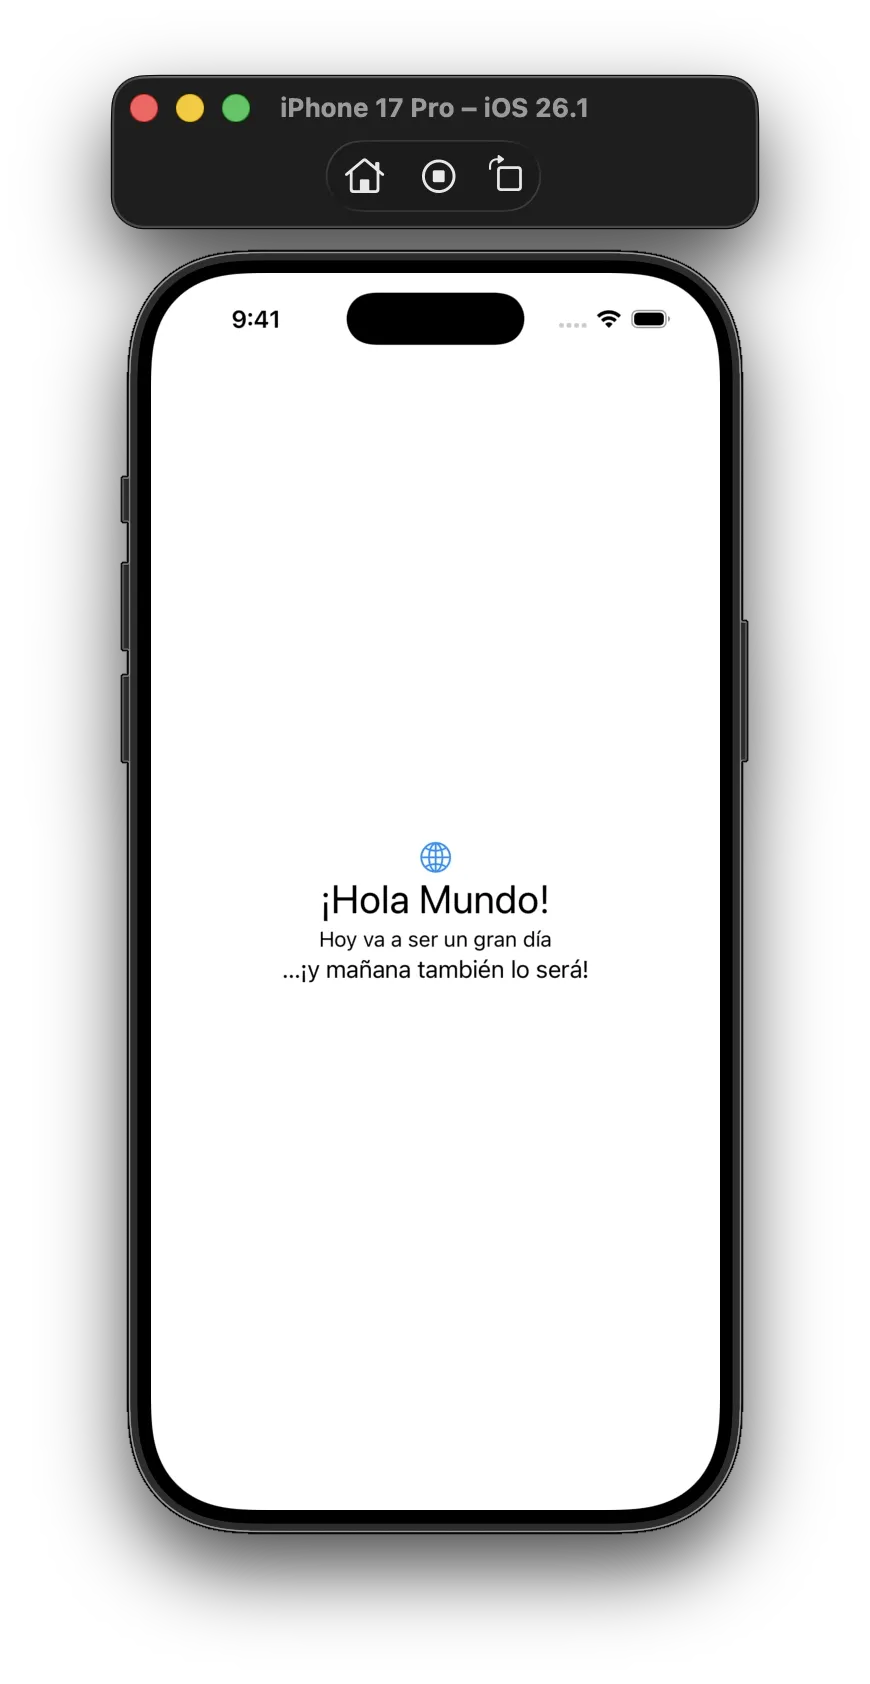
Great, so we’ve translated all of our app strings to a new language…how can we test our changes in the app?
You can change the regional/locale settings on device, or simply modify the build scheme to use a specific App Language.
Now when you run the app, you can see all your translated strings!
For SwiftUI previews, simply modify the locale environment to get feedback in real time:
#Preview {
  ContentView()
    .environment(\.locale, .init(identifier: "es"))
}
Designing an Interface That Travels Well
Our new app looks great translated to Spanish, but what about languages that read right-to-left, or languages whose words can be super long like German?
RTL
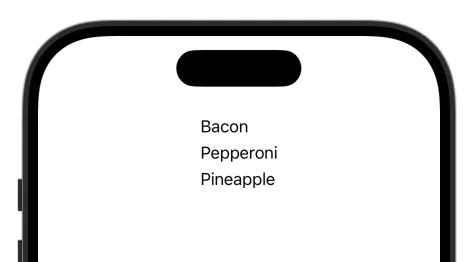
If you plan to localize your app in a language that reads right-to-left, you’ll need to think about how text (and images) are aligned on your screens. In English, a bulleted list will typically be left-aligned to the containing view. As a developer, I might do something like this:
VStack(alignment: .leading) {
  Text("Option 1")
  Text("Option 2")
  Text("Option 3")
}
Which would appear like this in the app:
If I translate my app to a RTL language like Arabic and if we don’t make any code changes to the alignment, does it work?
Turns out, in modern versions of iOS using the .leading modifier will actually take into consideration the language and will flip it, if needed.
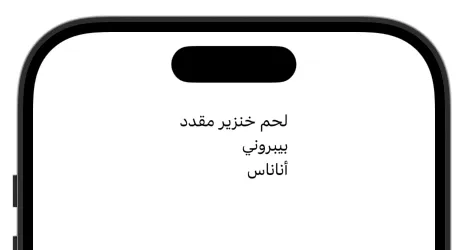
It’s going to be very important that you thoroughly test your apps with every language that you localize to to make sure your screen layouts still look great!
Long Words
It’s imperative to keep design considerations in mind with how different languages might interpret different strings. For example, if I use the string “user interface customization settings” in English, there are obvious breakpoints where it could be split across multiple lines. But in the German translation, it’s “Benutzeroberflächenanpassungseinstellungen,” a super long word. What do I want my interface to do in this case? Should it truncate the text? In the middle or at the end? Should it force line breaks?
These are just a couple design considerations to keep in mind when localizing.
One More String Before We Go
With minimal effort, you can see how easy it is to localize your app for multiple different languages. As mentioned earlier, this is one of those things that is much easier to implement as you go, rather than waiting until the end of a project. Apps can contain A LOT of strings, and quickly become overwhelming to localize. Taking a piecemeal approach allows you to keep your String Catalog up to date and relevant, while building a strong foundation for future success.
Photo by Yanping Ma on Unsplash