


Flutter + Sanity CMS: Rendering Portable Text with Tappable Annotations


Provide Powerful App Features Using Sanity’s Portable Text
Introduction
Want to give your content editors the ability to add another dimension to their content and drive more sales opportunities? Well, a hidden gem in Sanity, a popular headless CMS (Content Management System), opens up many possibilities in mobile and web apps to drive prospects and increase user interaction.
This blog post will go through setting up Sanity, enhancing our data model and Sanity Studio, and creating a simple mobile app demonstrating Portable Text’s possibilities.
Requirements for this tutorial
Before you start this tutorial, you’ll need the following:
- Visual Studio Code
- NodeJS
- Flutter
- Xcode or Android Studio with a working device or simulator
Get started with Sanity
-
Create an account by following the Get started tutorial at https://www.sanity.io/studio. Make sure to use the pets project sample.
-
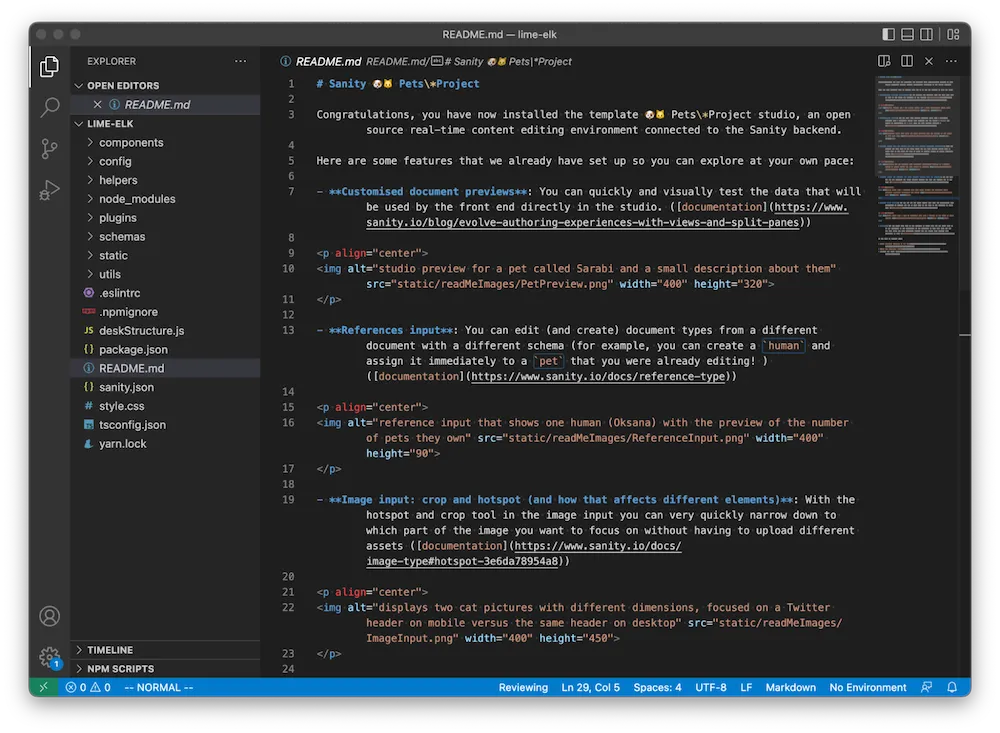
Start Visual Studio Code and open the directory created by the npm command at the end of that tutorial. You should see something like this:
-
Open the Terminal built into VS Code by choosing Terminal > New Terminal from the main menu.
-
Type the command
npm run start. -
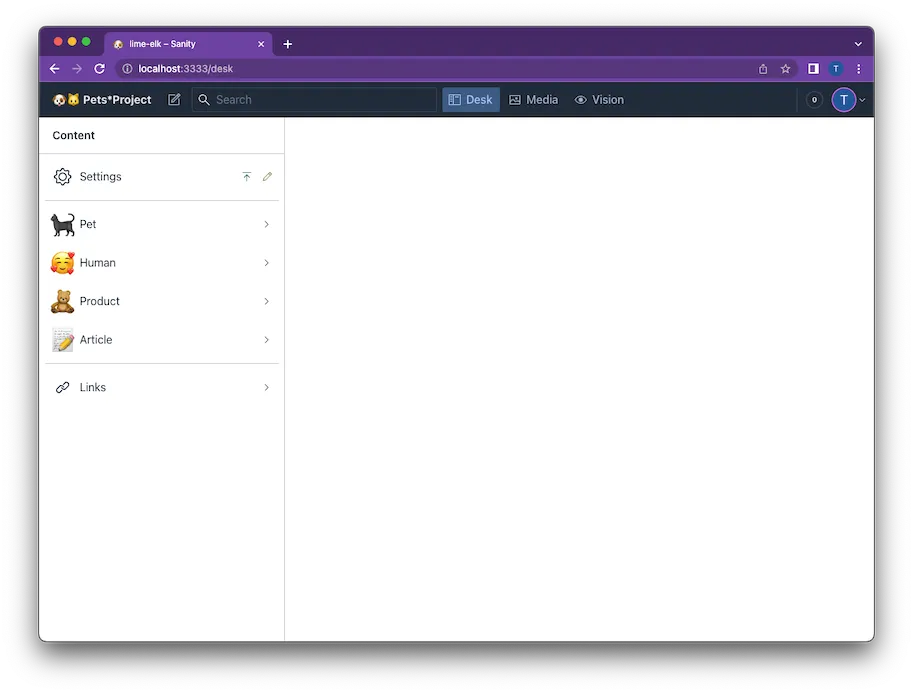
Click the link, and the Sanity Studio will launch in Chrome.
Understanding the Pets Project schema
The Pets Project Sample schema defines Pets, Humans and Products document types. We will focus on the Pets document type, specifically the block array field for the pet’s description. Sanity calls this block array Portable Text, and Portable Text allows you to extend rich text content with structured metadata in ways that let your content come to life!
In this demonstration, we will provide a way for a content editor to annotate text in the pet’s description and reference it to a specific Product document so the user can tap on the text and buy the product.
We will focus on the Tybalt pet. To see the description for Tybalt in the Sanity Studio, click on Pet on the left-most list and then click on Tybalt. You should see the following:
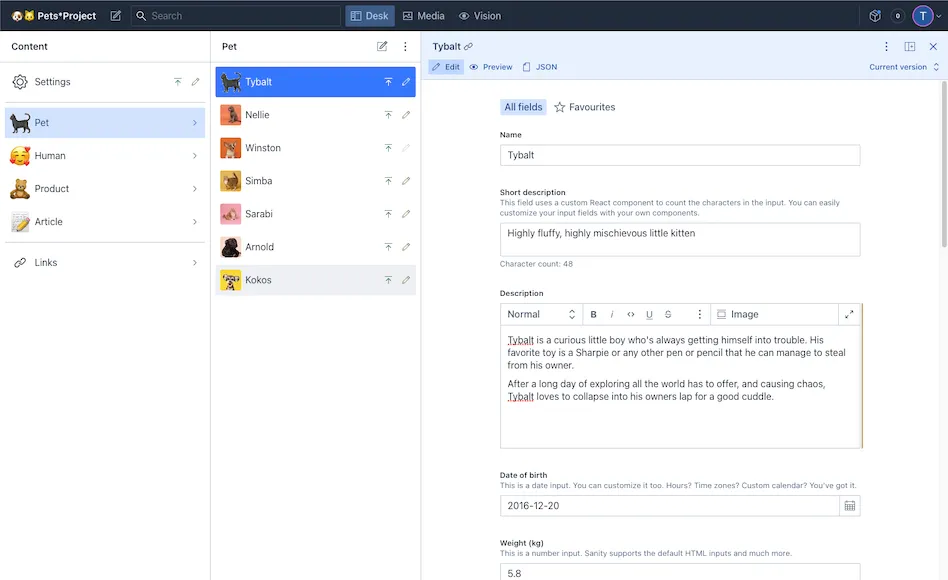
In the description text, there is mention of a Sharpie. In the Pets Project data, Sharpie is a Product object. You can see this by clicking on Product in the left-most list and then clicking on Sharpie in the list of Products.

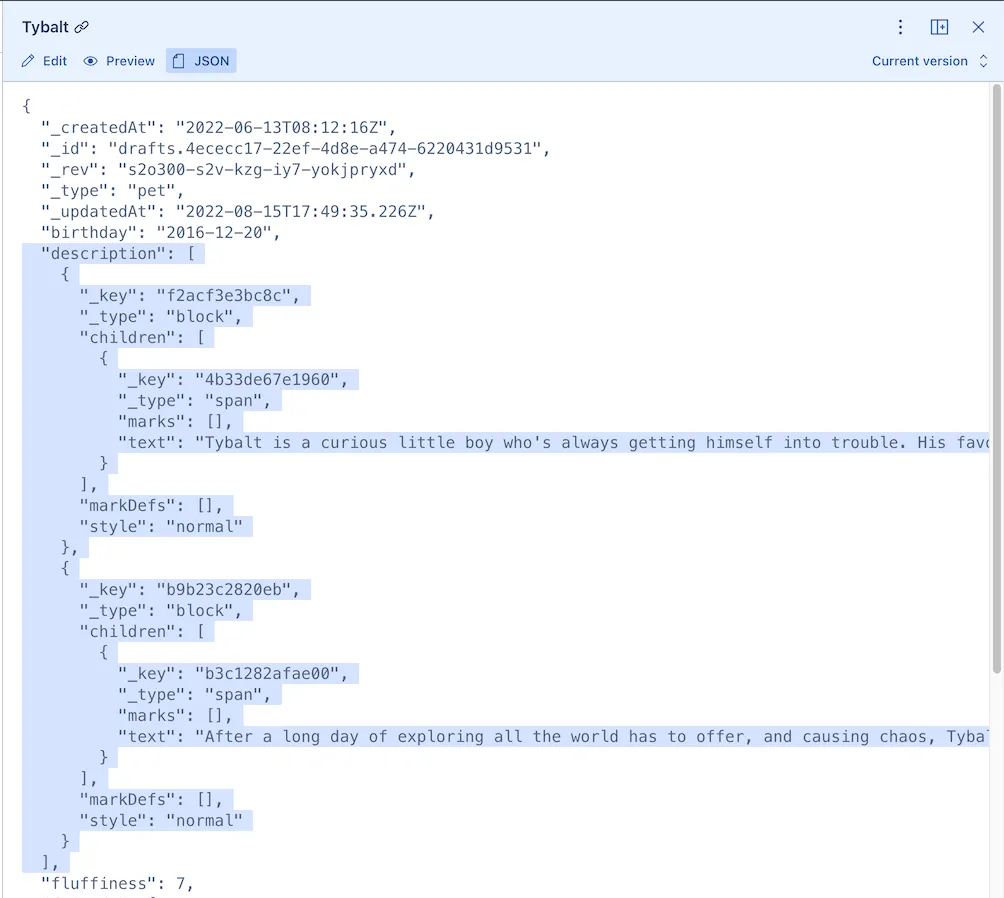
Now let’s look at the JSON that makes up the Tybalt pet. In the Sanity Studio, click on the JSON button in the toolbar at the top of the right-most panel.
Take notice of the description array. There are two block objects in the description array. We will see later how this array changes with the addition of an annotation.
Change the Pet schema
Next, we will add an annotations array to the description block similar to what this Sanity reference document describes. Then we will use that annotation through the Sanity Studio. To do this, follow these steps:
-
Using VS Code, edit the
pet.js. -
Change the
descriptionarray (line 47 at the time of this writing).from:
of: [{type: 'block'}, {type: 'image', options: {hotspot: true}}]to:
of: [ { type: 'block', marks: { annotations: [ { name: 'productAnnotation', type: 'productAnnotation', blockEditor: { icon: PackageIcon, render: ProductRenderer, }, }, ], }, }, { type: 'image', options: { hotspot: true } }, ]; -
Add
PackageIconto the imports from@sanity/iconsin line 2.
You’ll also get warnings about ProductRenderer around line 63 because we haven’t created that class yet.
Create annotation and renderer
- Create a new file named
productAnnotation.jsin theschemasdirectory using the contents from gist https://gist.github.com/troyatomic/37036f2a19d00a17572d5379aa9b025a. - Create a new directory under the
schemasdirectory namedcomponents. - Create a new file named
ProductRenderer.jsin thecomponentsdirectory using the contents from gist https://gist.github.com/troyatomic/8fc3b035b3a47d5cd417ab9afc73a253.
If you’re still getting compile warnings in pet.js, you can find the entire file with changes at https://gist.github.com/troyatomic/abd73775371ff5f9271efd435d5f40fe.
The Sanity Studio app should have refreshed automatically after the changes.
Change the description of the Tybalt pet
After changing the code, we will use the annotation in the description of the Tybalt pet.
- Using the Sanity Studio, click on Pet from the left-most list, then click on Tybalt.
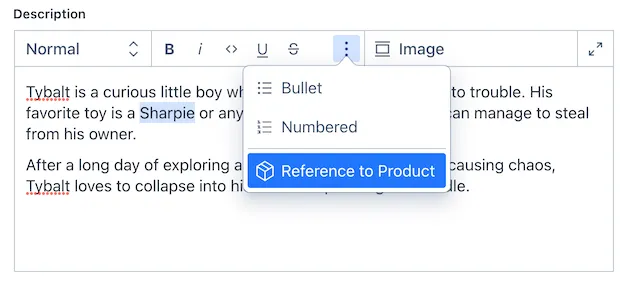
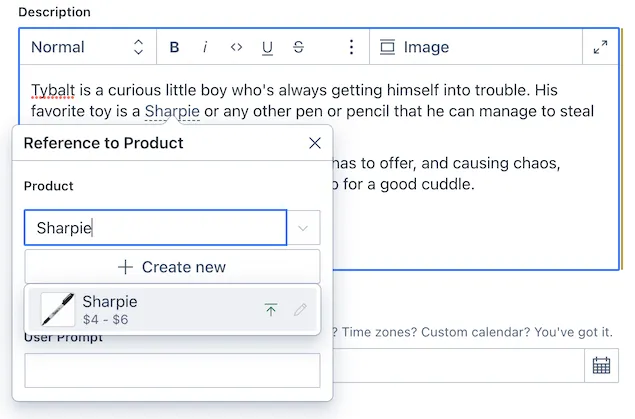
- Highlight the word Sharpie in the Description text, click on the three-dot icon in the style menu bar above the text and choose Reference to Product.
- In the Search text field, type
Sharpieand chooseSharpiefrom the list that appears.
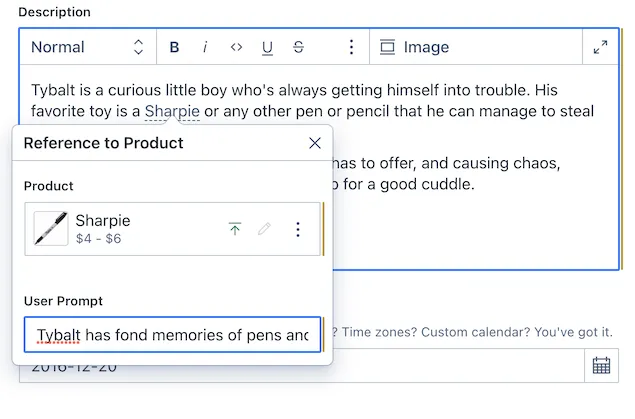
- In the User Prompt text field, type
Tybalt has fond memories of pens and pencils from kittenhood. Would you like to buy a Sharpie for your pet?.
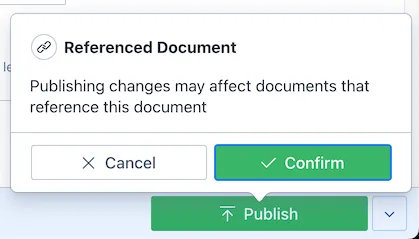
- Click the green Publish button at the bottom right, then click Confirm.
Review the Annotation in JSON
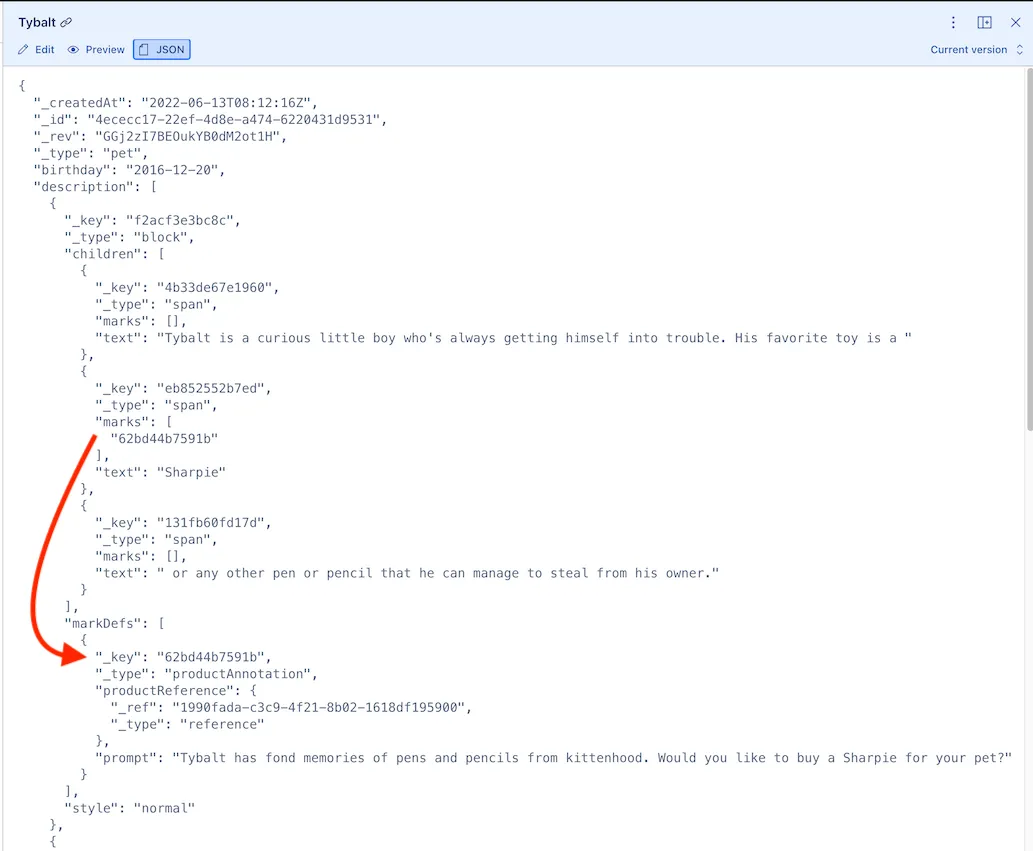
Let’s review the Tybalt Pet JSON to see how the annotation has changed the description property.
-
In the Sanity Studio with the Tybalt pet showing, click on the JSON button in the toolbar as before.
-
Notice that the
Sharpietext is now in its own object with amarksarray that maps to theproductAnnotation, which contains the reference ID for the Sharpie product and the User Prompt entered.
Create a Flutter app
In this next section, we will demonstrate the power of the Portable Text annotation in a Flutter-based mobile app, but you could do the same with Swift, Kotlin, Java, etc. To create the Flutter app, perform the following steps:
-
Using a command line terminal, create a flutter project using the command:
flutter create petsproject. -
Using VS Code, open the petsproject directory created by the flutter command above.
-
Copy the contents of gist https://gist.github.com/troyatomic/142f7bda164d674a5766f06b78d40f5a over the contents of the
pubspec.yamlfile. :::info Note, thepubspec.yamladdshttpandjson_annotationpackages to the app dependencies and addsbuild_runnerandjson_serializablepackages as dev dependencies. These are for making RESTful network requests and working with JSON. ::: -
Copy the contents of gist https://gist.github.com/troyatomic/c4171d6d2b7fd72c711209fb4fa9e8e4 over the contents of the
lib/main.dartfile. :::info Note, the Dart code does the following:
- Makes HTTPS call to Sanity backend with a GROQ query to get the Tybalt pet.
PortableTextWidgetclass renders a series ofPortableTextobjects.PortableTextStatelessWidgetclass iterates through the portable textchildren. If an item hasmarks, it will look for a correspondingmarkdefobject. If themarkdefhas typeproductAnnotation, then aTapGestureRecognizerwill be assigned for that bit of text rendered. :::
-
Open the VS Code Terminal window using choosing Terminal > New Terminal menu item, then run the command:
flutter pub get. -
Create generated code to parse the JSON into dart classes by entering command:
flutter pub run build_runner build --delete-conflicting-outputs.
Run the Flutter app
To run the app, perform the following:
-
In VS Code, choose the View > Command Palette menu item, type
Select Deviceand choose Flutter: Select Device item, then select the device or emulator you wish. -
In VS Code, open the
lib/main.dartfile and click on the Start Debugging button from the toolbar at top right.
After some time, the app will be built for the device or emulator selected and appear. It should look like the following:
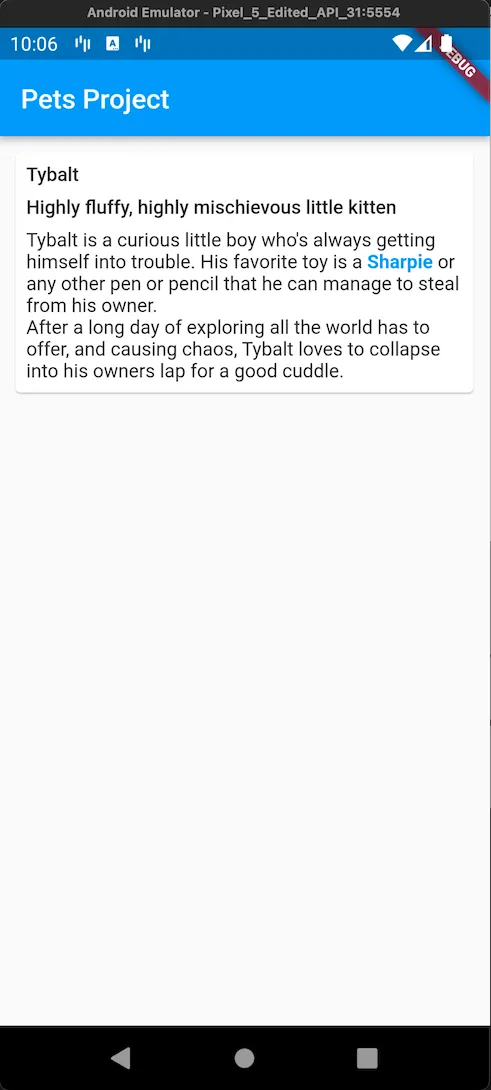
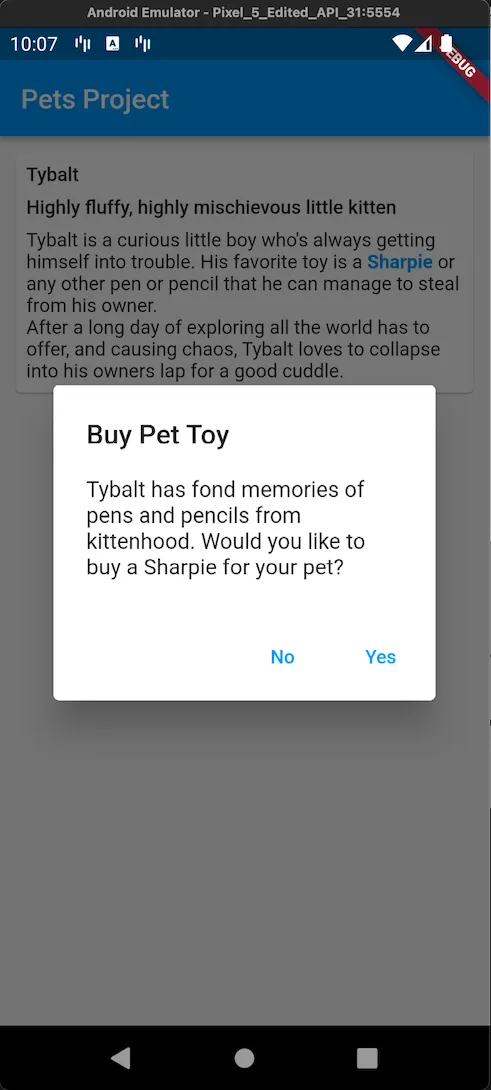
Once you have the app running on a device or emulator, click or tap on the Sharpie blue text. A popup dialog should appear, prompting you to buy the Sharpie.
Summary
The Portable Text component, Sanity’s hidden gem, allows content editors to add metadata to fragments of their text, adding another dimension to your user experience.
Some other ideas where Portable Text annotations could be used:
- Tap on a temperature in a recipe that sets your oven to that temperature.
- Tap on a product mentioned and find other products similar to it.
- Tap on a word and have it translated into the desired language or spoken in a language of choice.
- Tap on a temperature or unit of measurement and show the human-entered conversion to other units of measurement.
If you get stuck anywhere, you can find the repository of the code we used to create this blog post at https://github.com/atomicrobot/blog-sanity-portabletext-annotations. If you find any issues, don’t hesitate to contact us by creating an issue in that repo.
If this sounds helpful to you, please contact us. We would love to learn how we can help your team create new experiences!